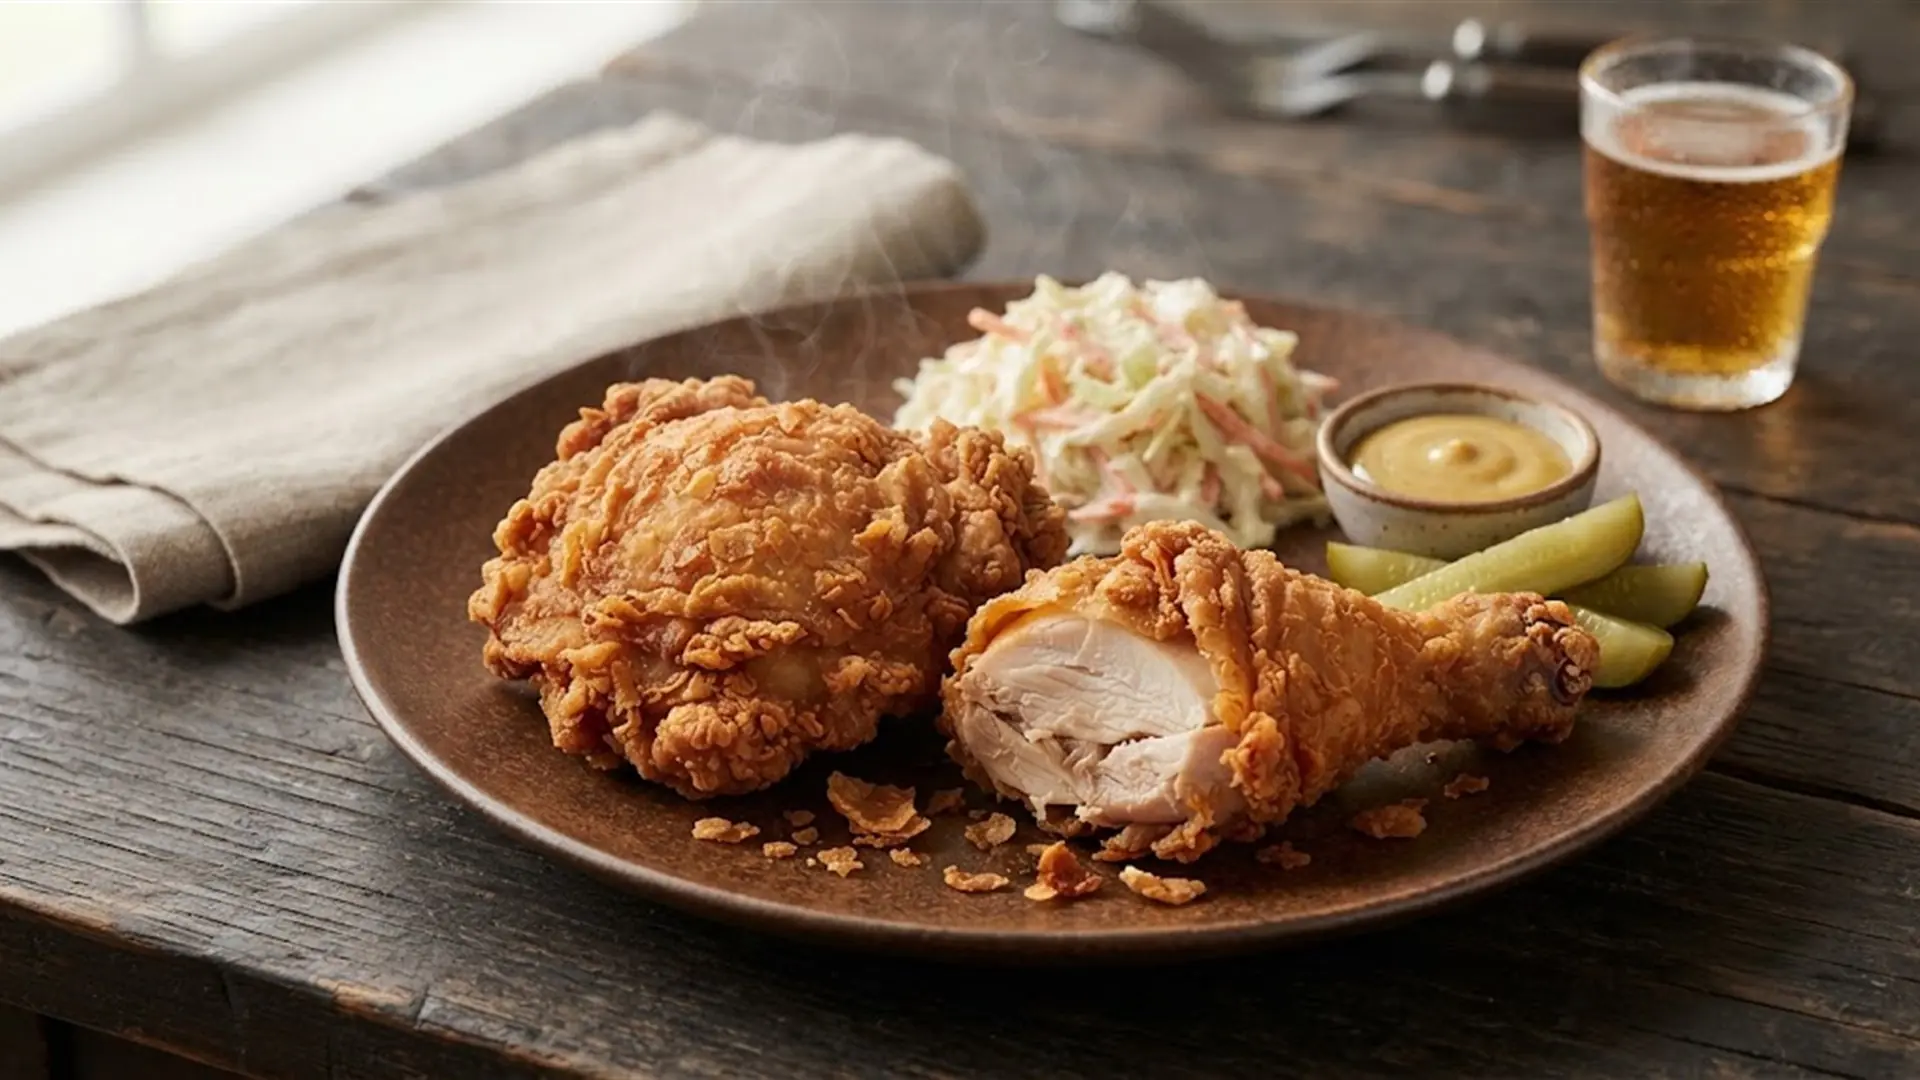
Summary: Boneless chicken thighs and drumsticks in a seasoned coating of all-purpose flour and cornstarch, fried in a deep fryer until golden brown. The coating clings to the surface of the meat thanks to the cornstarch and baking powder; an oil temperature of 330°F cooks the meat through before the coating darkens. Total time 40 minutes, makes 6 servings.
Did you make this recipe? Share your results with the community.
Category: Poultry, American cuisine
Success rate: not rated yet% of users nailed this recipe
Quick overview
- Dish: Fried Chicken – chicken coated in seasoned batter or flour and fried until golden brown, a staple of the American South
- Category: Poultry, American cuisine
- Cuisine: American
- Main ingredient: Boneless chicken thighs and drumsticks, 2.6 lb
- Guide: 12 most famous American dishes: traditional recipes from American cuisine
- Total time: 40 minutes (20 minutes prep + 20 minutes cooking)
- Difficulty: Medium
- Servings: 6 (Serving weight: 8.9 oz)
- Key technique: Deep frying at 330°F, double dredging
- Preparation types: Deep frying, pan frying
- Dietary info & Allergens:gluten
- Great for: Weekend lunch, family celebration, picnic, party with friends
- Nutrition (per 1 serving): 578 kcal, Protein: 41.0 g, Fat: 34.2 g, Carbs: 25.8 g
- Storage: 2 days in the fridge, 1 month in the freezer
- Pairing: Pale lager, dry cider, iced tea with lemon
- In short: Oil temperature, a dry surface on the meat, and a two-flour coating – three things that decide whether the crust holds and the meat stays juicy.
WAGUU says: “Fried chicken isn’t about the seasoning, it’s about the temperature difference. Cold meat and 330°F oil mean the coating sets instantly and the meat then cooks through in its own juices.”
Key facts
| Prep time: | 20 minutes |
| Cook time: | 20 minutes |
| Temperature: | Oil 330°F, internal meat temperature 165°F |
| Servings: | 6 (serving weight 8.9 oz) |
At a glance
A coating of all-purpose flour and cornstarch in a four-to-one ratio does two things: the cornstarch slows gluten formation so the crust stays crisp, and the baking powder in the coating creates tiny bubbles during frying that lift the coating off the meat. The meat must be dry and cold, the oil deep enough, and the temperature below 340°F – above that the coating burns before the drumstick cooks through.
Ingredients
Base servings: 6 servings • Serving weight: 9 oz
| Ingredient | Amount | Quality |
|---|---|---|
| boneless chicken thighs and drumsticks | 2.6 lb | fresh, skin on, chilled |
| all-purpose flour | 9.0 oz | sifted |
| cornstarch | 2.0 oz | pure, no additives |
| sweet paprika | 0.4 oz | sweet, ground |
| smoked paprika | 0.2 oz | smoked, ground |
| garlic powder | 0.3 oz | dried, ground |
| ground black pepper | 0.2 oz | freshly ground |
| cayenne pepper | 0.11 oz | ground, hot |
| fine sea salt | 2 tsp | for meat and coating |
| baking powder | 0.14 oz | aluminum-free |
| canola oil | 6.3 cups | for deep frying, high smoke point |
Why you’ll love this recipe
- Ready in 40 minutes: No overnight marinating. The meat is salted, coated, and fried in one batch.
- Crust that holds: Cornstarch in the coating limits gluten, so the crust doesn’t crack during frying and doesn’t fall into the oil.
- Exact ratios for 6 servings: 7 oz meat per serving, 1.8 oz coating mix, 6 cups oil is enough for two batches.
- Even a beginner can do it: Five stages, an oil thermometer, and clear visual checkpoints.
Why it works: When frying in oil at 330°F, the coating surface dries quickly, starch gelatinizes, and forms a crust that prevents moisture from escaping the meat. Baking powder decomposes in hot oil and releases carbon dioxide – tiny bubbles lift the coating from the meat surface, so the crust doesn’t stick and stays separate. Cornstarch contains no gluten, so it doesn’t form a stretchy structure like wheat flour; the coating stays crisp and brittle. The internal temperature of the meat must reach 165°F so the thigh proteins bind and the meat releases juice, but not so long that the water boils away – that’s why the ratio of oil temperature to piece thickness matters.
Recipe overview
Prep: 20 min | Cook: 20 min | Difficulty: Medium | Servings: 6 | Type: Main dish | Origin: American
Detailed instructions
Total progress: 0 % done
Stage 1: Meat preparation – 12 min
Equipment: kitchen scale, refrigerator
2 Take the chicken thighs and drumsticks out of the refrigerator, pat them dry on all sides with a paper towel, and weigh them. Rub half the salt over the meat surface, leave the other half for the coating. Put the meat back in the refrigerator and prepare the coating.
VKB: The meat surface is matte and dry to the touch, no red traces remain on the towel. Pieces are evenly sized, about 2 × 3 inches.
Before you move to the next step:
Do not wash the chicken. Water spreads bacteria around the sink and a wet surface won’t hold the coating – you’ll get bare spots instead of crust. Dry the meat with a paper towel.
Stage 2: Coating – 6 min
Equipment: kitchen scale, two wide bowls, wire rack
2 In a wide bowl, mix all-purpose flour, cornstarch, remaining salt, sweet paprika, smoked paprika, garlic powder, ground black pepper, cayenne pepper, and baking powder. Coat the meat pieces so the surface is covered on all sides; always shake off excess mixture so it doesn’t burn in the oil. Place coated pieces on a wire rack and let them rest for 10 minutes.
VKB: There are no bare spots on the meat surface, the coating is evenly covered with spices, and after shaking, a thin layer remains on the piece. The mixture in the bowl is a quarter lower than at the start.
Before you move to the next step:
Let the coating rest on the rack. If you put the pieces into the oil immediately, the coating washes off to the bottom and the crust will be thin. Ten minutes is enough for the flour to absorb moisture from the meat surface.
Stage 3: Heating the oil – 8 min
Equipment: deep fryer or deep cast-iron skillet, oil thermometer
2.04 Pour canola oil into the deep fryer and heat it to 330°F. Fill the fryer no more than two-thirds full so the oil doesn’t bubble over the edge when you add the chicken. Monitor the temperature with a thermometer and adjust the heat as needed.
VKB: The thermometer reads 330°F. When a bit of breading falls into the oil, it sinks to the bottom and within two seconds rises back up and starts to bubble gently.
Before you move to the next step:
Oil below 320°F makes the coating absorb fat and turn greasy. Oil above 355°F burns the coating before the chicken cooks through. Stick to 330°F and check the temperature before each batch.
Phase 4: Frying the first batch – 12 min
Equipment: deep fryer, tongs, meat thermometer
4. Using tongs, lower half the pieces into the oil. Fry them 6 to 7 minutes per side, until the coating turns deep golden brown. Don’t overcrowd the fryer – adding too many pieces at once drops the oil temperature and the coating absorbs fat. Remove the pieces and place them on a wire rack set over a baking sheet, not on paper towels.
VKB: The coating is deep golden and dry on the surface. A thermometer inserted into the thickest part of a piece reads 165°F and the juices run clear.
Before you move to the next step:
Don’t set the finished pieces on paper towels. Steam condenses under the crust and the coating turns soggy. A wire rack over a baking sheet lets the fat drain and keeps the crust dry.
Phase 5: Second batch and resting – 12 min
Equipment: deep fryer, wire rack, oven
5. Let the oil return to 330°F, check the temperature, and fry the second half of the pieces the same way as the first. Transfer the finished pieces to the first batch and keep them in the oven at 175°F until you’re ready to serve. Let the chicken rest three minutes before serving so the juices stay inside.
VKB: Both batches have the same color. When you cut into a piece, the juices stay in the meat and don’t run onto the plate. The coating sounds hollow when tapped.
Required equipment
| Tool | Ideal size | Alternative | Risk |
|---|---|---|---|
| deep fryer | 4 qt capacity, 9.5 in diameter | deep cast-iron skillet or wok | in a shallow pan the pieces only fry partially and the coating on the sides doesn’t cook through |
| oil thermometer | up to 425°F, with a clip for the rim | breading test | without measuring, you’re only guessing the temperature and the coating burns easily |
| meat thermometer | probe style | checking the color of the juices | the coating darkens before the chicken is cooked through, and without measuring you can’t tell |
| wire rack over a baking sheet | 12 × 8 in | oven rack set over a baking sheet | on paper towels, steam condenses under the crust and the coating turns soggy |
| frying tongs | long, metal | two spatulas | short tools mean burns from splattering oil |
Shopping list
Nutrition facts
Values per 1 serving (without sides). Serving weight 252 g. The serving weight does not include frying oil; the values include fat absorbed during frying, about 8% of the piece weight.
| Nutrient | Per 100 g | Per 1 serving | Per 6 servings |
|---|---|---|---|
| Energy | 229 kcal | 578 kcal | 3468 kcal |
| Fat | 13.6 g | 34.2 g | 205.3 g |
| of which saturated | 2.1 g | 5.4 g | 32.1 g |
| Carbohydrates | 10.2 g | 25.8 g | 154.5 g |
| of which sugars | 0.03 g | 0.1 g | 0.4 g |
| Protein | 16.3 g | 41.0 g | 245.8 g |
| Salt | 0.81 g | 2.04 g | 14.40 g |
| of which sodium | 0.38 g | 0.96 g | 5.76 g |
Reference intake of an average adult (8400 kJ / 2000 kcal).
WAGUU Pro level
- Pro standard: Tested recipe with precise ratios and visual checkpoints.
- Tip 1: Keep the flour-to-starch ratio at four parts flour to one part starch. More starch makes the coating hard and glassy, less makes it soft.
- Tip 2: Measure the oil temperature before each batch, not just once at the start. After you add the chicken it drops 10 to 15°F and needs to come back up.
- Tip 3: Always fry boneless thighs and drumsticks in equally sized pieces. Chicken breast needs less time and will dry out if fried for the same duration.
- Tip 4: Strain the oil through a fine mesh sieve after frying and use it two more times. After the third fry, the oil starts to foam and transfers a burnt taste.
The science behind it
The flavor and color of the crust come from two processes. The first is evaporation of water from the surface of the chicken: as long as water escapes, the surface stays at 212°F and can’t brown. Only when the coating is dry does the surface temperature rise above 285°F and the Maillard reactions between amino acids and reducing sugars begin – creating brown color and aromatic compounds. The second process happens inside the coating: starch above 140°F absorbs water and swells, forming a continuous crisp layer. Baking powder breaks down in hot oil, releasing carbon dioxide and steam; the bubbles lift the coating away from the chicken and create the characteristic flakes. Cornstarch contains no gluten, so the coating doesn’t form a stretchy network, which is why it shatters instead of turning rubbery. In the meat, myofibrillar proteins contract at 140 to 158°F and squeeze out water; at 165°F the chicken is cooked through and tender, above 185°F the fibers contract so much that the meat loses its juices.
Fine Dining – Professional techniques
- Plate composition: Place two pieces on a warm plate overlapping each other, and next to them a scoop of mashed potatoes with a spoon-made well filled with a spoonful of pan gravy.
- Texture contrasts: Add soft mashed potatoes and a crunchy pickle to the crispy coating. Three textures in one bite hold attention.
- Temperature contrast: Serve the chicken hot and the pickled vegetables ice-cold. The chill on the tongue highlights the temperature of the crust.
- Aromatic additions: Add a teaspoon of dried lemon zest to the coating. The aroma releases with the heat of the oil and bridges the spices with the pickle on the plate.
Sensory radar
- Appearance: Deep golden crust with small flakes and lighter spots where the coating lifted off the chicken. When cut, the meat is light and juicy.
- Aroma: Fried fat, sweet paprika, and a smoky undertone. A gentle cayenne heat in the background.
- Taste: Salty crust with paprika sweetness, followed by the meaty flavor of the thigh and a cayenne warmth at the end.
- Texture: The crust shatters and sounds hollow, the meat underneath is tender and juicy. The layer between coating and meat stays dry.
Pairings
- Light lager: Hop bitterness cuts through the fat from the coating. Serve chilled at 43–46°F.
- Dry cider: Apple acidity refreshes after fried food. Good with spicier versions that use more cayenne.
- Iced tea with lemon: Tannins from the tea dry the mouth after fat and lemon balances it. A non-alcoholic option for kids and drivers.
- Sour pickle: Fermented vegetables add acidity and crunch and work against greasiness.
Variations
- Bone-in pieces: Fry 1500 g bone-in thighs and drumsticks three minutes longer. The bone holds heat and the meat stays juicier, but the serving weight is lower.
- In an air fryer: Brush the coated pieces with oil and cook at 400°F for 25 minutes, turning halfway. Less oil, but the crust is drier and more brittle.
- Spicy version: Increase cayenne to 2 tsp and add 2 tsp chili powder to the coating. The heat hits after you bite through the crust.
Allergens and dietary information
Contains: wheat/gluten (all-purpose flour) • Gluten: yes, in the coating • Not suitable for: people with celiac disease or gluten allergy; for a gluten-free diet, use gluten-free flour and a separate frying batch
Suitable for
Weekend family lunch, celebration for six to ten people, picnic, party with friends, homemade version of fried chicken.
Substitution guide
- Boneless chicken thighs: chicken breast cutlets sliced into strips. Fry for three minutes less; the meat is leaner and dries out faster.
- All-purpose flour: gluten-free flour blend of rice and corn in a 2:1 ratio. The coating behaves similarly but browns faster.
- Cornstarch: potato starch. The crust is a bit harder and less flaky.
- Canola oil: sunflower oil or peanut oil. Peanut oil handles higher heat and adds a mild nutty note.
- Cayenne pepper: sweet paprika with a pinch of chili. Less heat, slightly lighter color.
FAQ
Why does the coating fall off the chicken?
Most often because the chicken was wet or the coating didn’t rest. Pat the chicken dry with paper towels and let the coated pieces sit on a wire rack for ten minutes so the flour absorbs moisture.
What’s the right oil temperature?
330°F. At lower temperatures the coating soaks up oil and turns greasy; at higher temperatures it darkens before the chicken cooks through. Check the temperature before each batch.
Can I bake the chicken instead of frying?
Yes. Brush the coated pieces with oil and bake at 400°F for 25 minutes, turning halfway. The crust will be drier and more brittle, but the meat stays juicy.
How much oil do I need and what do I do with it after frying?
For 2.5 lb of chicken, 6 cups of oil in a 4-quart pot is enough. After frying, let the oil cool, strain through a fine mesh sieve, and reuse it twice more.
Why add baking powder to the coating?
It breaks down in hot oil and releases carbon dioxide. The bubbles lift the coating from the chicken, so the crust stays separate and flaky instead of glued on.
How do I know the chicken is cooked through?
An instant-read thermometer inserted into the thickest part reads 165°F and the juices run clear. If the juices are pink, return the piece to the oil for two minutes.
WAGUU Petr’s tip: Cooking for 6 or more?
6–8 people: Fry in two batches and keep the finished pieces in a 175°F oven on a wire rack. Check the oil temperature before the second batch; it drops about 10°F. • 10+ people: Set up two frying pots side by side or fry ahead and reheat the pieces in a 350°F oven for 8 minutes. The coating stays crispy if you place the pieces on a wire rack, not a baking sheet.
Sides and serving
Storage and reheating
Refrigerator: 2 days • Freezer: 1 month • Reheating: Reheat pieces in a 350°F oven for 10 minutes on a wire rack. In the microwave, the coating steams and loses crispness. Thaw frozen pieces in the refrigerator before reheating.
Author: WAGUU Petr & Team • Published: 6 Oct 2026 • Updated: 9 Oct 2026
More recipes from the article
Guide: 12 most famous American dishes: traditional recipes from American cuisine
Barbecue Ribs – slow-cooked or smoked pork ribs brushed with barbecue sauce
Pulled Pork – slow-cooked or smoked pork shredded into strands and served with barbecue sauce
Mac and Cheese – pasta with a rich cheese sauce, often Cheddar, baked until golden
Gumbo – thick Louisiana stew-like dish with meat or seafood, vegetables, and a boldly seasoned base
More recipes you might like
Why WAGUU?
WAGUU recipes are checked for accuracy of ingredients, methods, and nutritional values. For this recipe, the amounts appear in the same form in the ingredient table, each step, the shopping list, and the printable version – 2 cups flour and 1/2 cup starch match the coating mixture used for all twelve pieces of chicken.
Photo gallery from the process
Photos from the community: Cook, snap a photo, and share your result.
You can upload photos in the comments below or send them by email.
Did you film a video of our recipe? Paste the link to YouTube, YouTube Shorts, TikTok, Instagram Reels, Facebook Reels, Pinterest, Vimeo, or X (Twitter) in the comments – we’ll be happy to publish it and help you and your content get noticed.
Most common mistakes
- Low oil temperature – the coating soaks up oil and the crust turns greasy. Heat the oil to 330°F and check the temperature before each batch.
- Overcrowded pot – when you add the chicken, the oil temperature drops and the pieces steam instead of fry. Fry at most half the chicken at a time.
- Wet chicken – the coating washes off and the crust falls away. Pat the chicken dry with paper towels before coating and let the coated pieces rest for ten minutes.
- Finished pieces on paper towels – steam collects under the crust and the coating softens. Place them on a wire rack over a baking sheet.