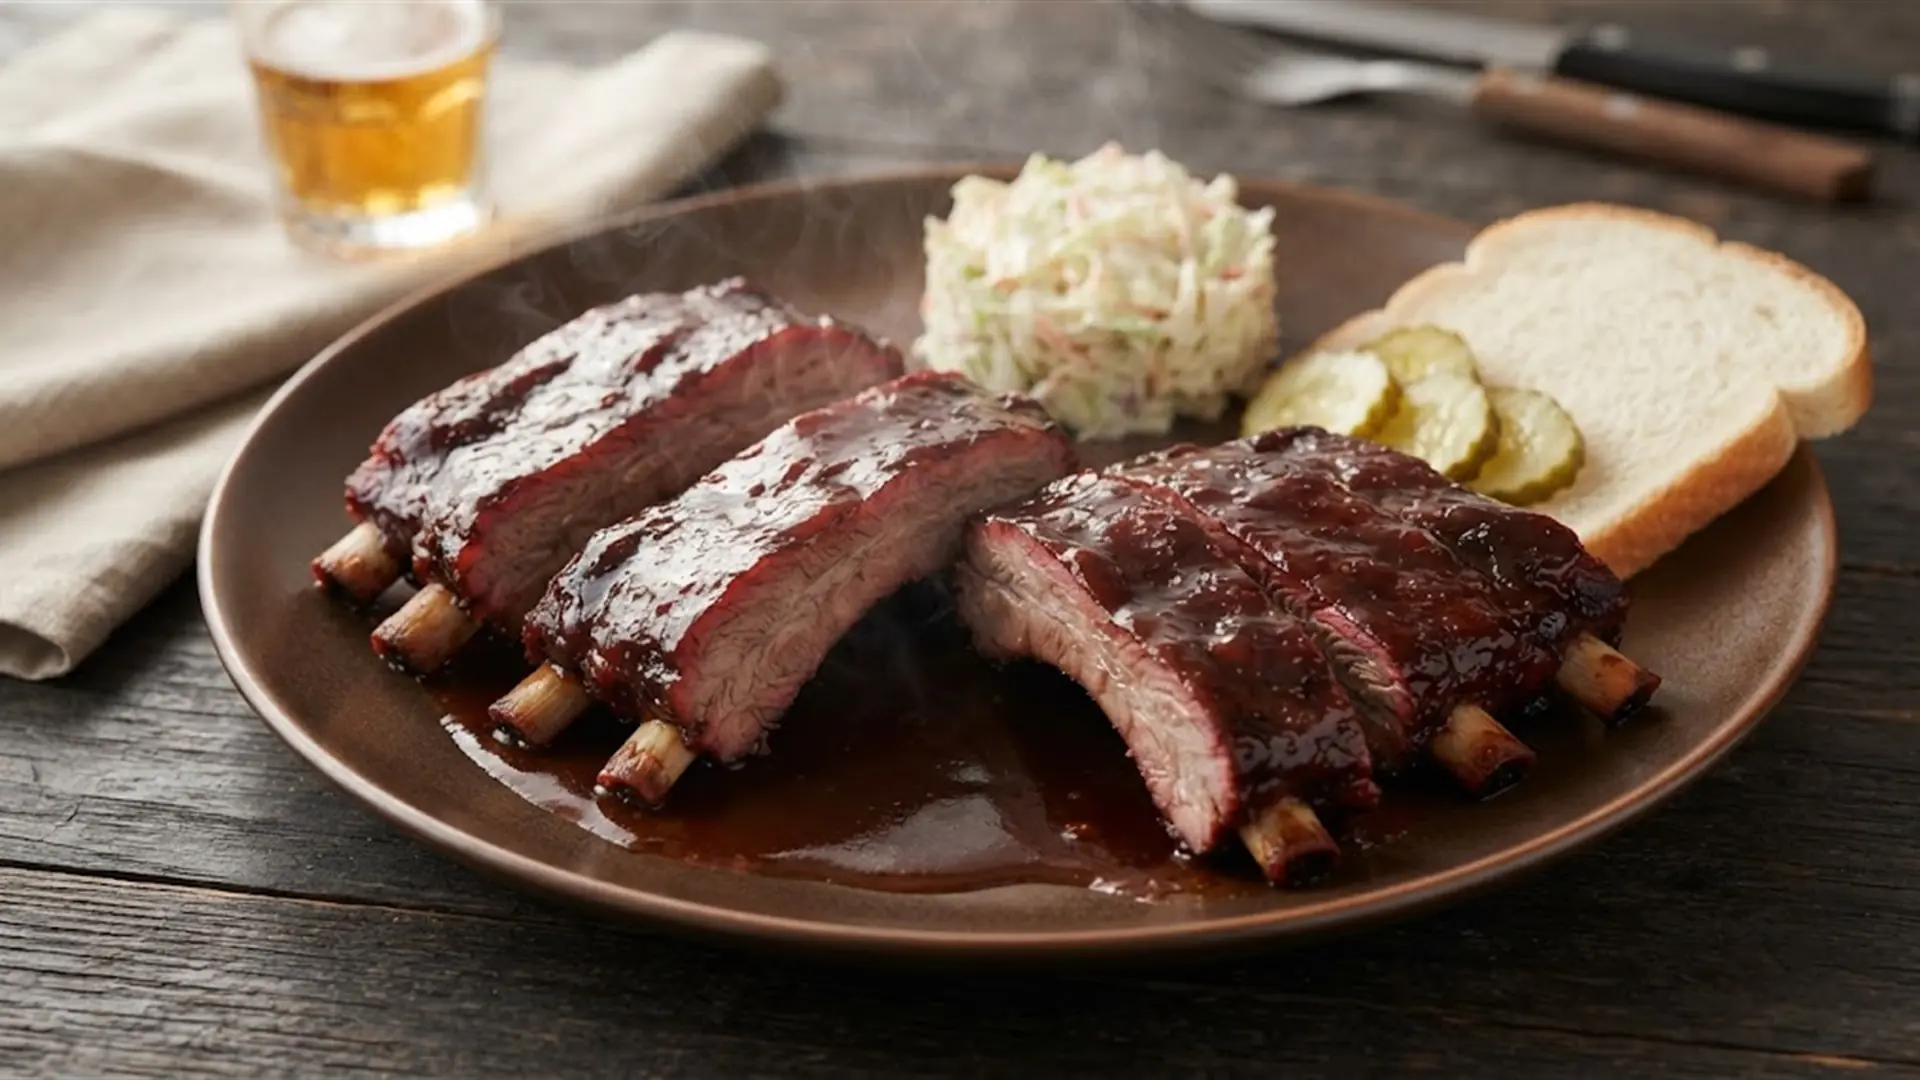
Summary: Barbecue Ribs are pork ribs slow-cooked at low temperature and brushed with barbecue sauce – 4 lb of ribs for 6 servings, a dry rub of paprika, brown sugar, garlic, cumin, and chili, 3 to 4 hours at 250 °F, and sauce applied only in the final stage. Total 230 minutes, medium difficulty.
Did you make this recipe? Share your result with the community.
Category: Pork, American cuisine
Success rate: not rated yet % of users mastered this recipe
Quick overview
- Dish: Barbecue Ribs – slow-roasted or smoked pork ribs brushed with barbecue sauce
- Category: Pork, American cuisine
- Cuisine: American
- Main ingredient: Whole rack of pork ribs, 4 lb (spareribs or baby back ribs, meaty, with an even layer of fat)
- Guide: 12 most famous American dishes: traditional recipes from American cuisine
- Total time: 230 minutes (30 min prep + 200 min cooking)
- Difficulty: Medium
- Servings: 6 (Serving weight: 9.4 oz)
- Key technique: Low-and-slow roasting, removing the membrane, dry rub, glazing with barbecue sauce at the end
- Cooking methods: Roasting, Smoking, Slow cooking
- Dietary info & allergens:mustard, sulfites, fish
- Great for: Weekend cooking, gatherings with friends, grilling season, celebrations
- Nutrition (per serving): 621 kcal, Protein: 34.5 g, Fat: 42.6 g, Carbs: 25.8 g
- Storage: 4 days in the fridge, 3 months in the freezer
- Pairing: Pale lager or hard cider, dry rosé, apple cider
- In short: Ribs aren’t about how much sauce you use, but about time – three hours at 250 °F does more than any spice blend.
WAGUU says: “Barbecue ribs aren’t judged by the sauce, but by the bone. The moment the meat starts pulling away from the bone and the bone slides out with slight resistance, it’s done.”
Key facts
| Prep time: | 30 minutes |
| Cook time: | 200 minutes (250 °F in the oven; 230–265 °F in a smoker) |
| Temperature: | 250 °F for roasting, 300 °F for wrapped ribs, 400 °F for glazing |
| Servings: | 6 (4 lb of ribs, edible serving weight 9.4 oz) |
At a glance
Pork ribs, a dry rub, and three hours in the oven. No complicated technique – just patience, low temperature, and sauce that comes into play only at the end. The result is a dark bark, meat that pulls away from the bone, and the aroma of smoke and paprika drifting from the oven all afternoon.
Ingredients
Base servings: 6 servings • Serving weight: 9.4 oz
| Ingredient | Amount | Quality |
|---|---|---|
| Whole rack of pork ribs | 4.0 lb | spareribs or baby back ribs, meaty, with an even layer of fat |
| Sweet paprika | 0.7 oz | sweet, finely ground |
| Brown sugar | 1.0 oz | muscovado or dark brown |
| Granulated garlic | 0.4 oz | dried, finely ground |
| Ground cumin | 0.2 oz | ground, freshly crushed |
| Chili powder | 0.14 oz | ground, to your heat tolerance |
| Fine sea salt | 2 tsp | fine, without anti-caking agents |
| Freshly ground black pepper | 0.14 oz | whole peppercorns, crushed before use |
| Dijon mustard | 0.7 oz | smooth, no added sugar |
| Ketchup | 9.0 oz | no added flavorings, preferably gluten-free |
| Apple cider vinegar | 1/3 cups | fermented, 5% acidity |
| Worcestershire sauce | 0.7 tsp | fermented, contains anchovies |
| Honey | 1.0 oz | clover, runny |
| Smoked paprika | 0.2 oz | dried, ground, sweet |
| Garlic cloves | 3 pcs | fresh, firm, no sprouts |
Why you’ll love this recipe
- Low temperature instead of babysitting: The ribs go into the oven at 250 °F and you don’t have to touch them for the next three hours. The only work is the rub and the last half hour.
- Works without a smoker: A sheet pan with a rack in a regular oven gives just as tender meat as a smoker. Smoked paprika and Worcestershire sauce provide the smoky note.
- The sauce won’t burn: The sugar in barbecue sauce burns at higher heat, so it goes on only in the final stage. Until then, only the dry rub does the work.
- Even a beginner can handle it: The recipe has six stages, three of which are prep. Time and temperature matter, not hand technique.
Why it works: At 250 °F the internal temperature of the meat stays in the range where collagen slowly converts to gelatin and the meat stays juicy. The salt in the rub first draws moisture from the surface, dissolves in it, and the solution returns into the meat – that’s how the seasoning gets below the surface. The sugar and honey in the sauce go on only in the last 20 minutes, when the surface of the meat is dry and the heat is enough for a glossy glaze but not for burning.
Recipe overview
Prep: 30 min | Cook: 200 min | Difficulty: Medium | Servings: 6 | Type: Main dish | Origin: American cuisine
Detailed instructions
Overall progress: 0 % done
Stage 1: Preparing the ribs and removing the membrane – 10 min
Equipment: none
2 Line a sheet pan with aluminum foil and set a wire rack on it. Place the ribs bone-side up and use a paring knife or the tip of a fork to lift the membrane at one edge. Grab the membrane with a paper towel and pull it off in one motion along the whole length. If it sticks, help with a knife along the bones, but don’t cut into the meat. Flip the ribs and pat both sides thoroughly dry with paper towels. Brush them with Dijon mustard and spread a thin layer into the crevices between the bones. Season with fine sea salt and freshly ground black pepper.
VKB: The membrane comes off in one piece and the bone-side of the ribs shows bare bone and pink meat with no white film – that’s where the rub sticks and penetrates the meat.
Before you move to the next step:
Don’t rinse the ribs. Water on the surface dilutes the rub, slows bark formation, and spreads bacteria around the kitchen. Pat them dry with paper towels.
Phase 2: Dry Rub and Barbecue Sauce – 15 min
Equipment: small saucepan, stove, bowl
2. In a bowl, combine sweet paprika, brown sugar, granulated garlic, ground cumin, ground chili, and smoked paprika. Divide the mixture into two parts – rub the larger portion all over the ribs, on all sides, top, and between the bones, and set the remaining rub aside for later. In a second saucepan, combine ketchup, apple cider vinegar, Worcestershire sauce, honey, and sliced garlic cloves. Bring to a gentle simmer and cook for 10 minutes, until the sauce thickens slightly.
VKB: The sauce is smooth, glossy, and holds a trail on the back of a spoon. When you drag a spoon across the bottom of the pan, the line closes slowly, not immediately.
Before you move to the next step:
Sugar in the rub clings to a wet surface, so dry the ribs before applying. A dry surface means an even bark instead of soggy spots.
Phase 3: Cold Rest – 5 min and Marinating
Equipment: refrigerator
2 Place the rubbed ribs on a wire rack set over a baking sheet, cover loosely with plastic wrap, and refrigerate for at least 1 hour, preferably overnight. During the rest, salt and spices penetrate the surface layer of the meat. Meanwhile, let the sauce cool and store it in the refrigerator in a sealed container. Preheat the oven to 250°F at least 20 minutes before putting the meat in.
VKB: The surface of the meat is damp to the touch and the seasoning has absorbed – only a faint trace of rub remains on your finger, not a loose layer.
Before you move to the next step:
Don’t put the meat in the oven straight from the refrigerator. Let it sit on the counter for 20 minutes to even out the temperature – cold ribs cook unevenly.
Phase 4: Low-Temperature Dry Baking – 120 min
Equipment: oven 250°F, smoker 225–265°F (alternative)
4. Place the ribs on a wire rack meat side up and set a foil-lined baking sheet under the rack to catch the rendered fat. Bake for 120 minutes at 250°F. During this time, do not flip the meat and do not open the oven more than once. If you have a smoker, smoke the ribs at 225–265°F for the same time over indirect heat, adding one small batch of wood about an hour in.
VKB: The surface of the ribs has darkened to mahogany and is dry to the touch. The meat bends when squeezed with tongs but doesn’t break, and it hasn’t pulled away from the bone yet.
Before you move to the next step:
If the surface starts to scorch before the end of this phase, lower the temperature to 230°F and loosely cover the ribs with foil. Raising the temperature to speed things up doesn’t help.
Phase 5: Wrapped Ribs and Glazing – 45 min
Equipment: oven 300°F and 400°F, foil, brush
5. Remove the ribs, place them on a double layer of foil, sprinkle with the remaining rub, and wrap tightly. Return them to the oven at 300°F and bake for 75 to 105 minutes, until the meat starts to pull away from the bone. Then open the foil, transfer the ribs back to the rack, and brush them with barbecue sauce. Return them to the oven heated to 400°F and bake for 10 minutes. Remove, brush with a second layer of sauce, and bake another 8 to 10 minutes, until the glaze starts to bubble and shine.
VKB: The glaze is glossy, dark red, and clings to the surface of the meat; only occasional drips form on the baking sheet under the rack, not streams. The meat has pulled back from the bone by about half an inch, and the bone can be pulled out with slight resistance.
Before you move to the next step:
Apply the sauce in thin layers, not one thick coat. A thick layer of sugar on the surface will blacken before the meat is heated through.
Phase 6: Rest and Slicing – 10 min
Equipment: cutting board, large knife
2 Remove the ribs from the oven and let them rest for 10 minutes on a cutting board, loosely covered with foil. Then place them bone side down and cut with a large knife between the bones into individual ribs in one stroke. Gently reheat the remaining barbecue sauce and serve it separately in a bowl so everyone can add as much as they like.
VKB: When slicing, the knife passes between the bones without resistance and the meat doesn’t tear. The cross-section shows pink juices, not blood, and the meat holds to the bone.
Required Equipment
| Item | Ideal Size | Alternative | Risk |
|---|---|---|---|
| Large roasting pan | 16 × 12 in | deep oven baking sheet | A small pan forces the ribs to stack on top of each other and the meat cooks unevenly. |
| Wire rack for pan | 14 × 10 in | grill grate or cooling rack | Without a rack, the ribs steam in their own fat and the surface stays soft instead of forming a bark. |
| Oven thermometer | up to 480°F | oven with an accurate thermostat | An oven set to 250°F may actually run at 300°F, and then the meat dries out. |
| Aluminum foil | two 16 in layers | parchment paper and a covered roasting pan | A single layer tears during handling and juices leak onto the pan. |
| Pastry brush | silicone, 1.5 in | spoon and quick brushing | Natural-bristle brushes deform in hot sauce and leave fibers behind. |
| Small saucepan | 1.5 qt capacity | deeper skillet with a lid | In a wide skillet, the sauce boils down quickly and scorches on the bottom. |
Shopping List
Nutrition Profile
Values per 1 serving of 9.4 oz edible portion (without sides). Calculated from average nutritional values of ingredients; the weight refers to the edible portion of the ribs, which is about 60% of the raw rib weight.
| Nutrient | Per 100 g | Per 1 serving | Per 6 servings |
|---|---|---|---|
| Energy | 233 kcal | 621 kcal | 3727 kcal |
| Fat | 16.0 g | 42.6 g | 255.4 g |
| of which saturated | 5.8 g | 15.5 g | 92.7 g |
| Carbohydrates | 9.7 g | 25.8 g | 154.5 g |
| of which sugars | 7.4 g | 19.8 g | 118.6 g |
| Protein | 13.0 g | 34.5 g | 207.1 g |
| Salt | 1.29 g | 3.44 g | 18.62 g |
Reference intake of an average adult (8400 kJ / 2000 kcal).
WAGUU Pro Level
- Pro standard: Verified recipe with precise ratios and visual checkpoints.
- Tip 1: Choose ribs by meat thickness, not by weight. Portions with less than half an inch of meat on the bone will dry out after long cooking, even if the rub is right.
- Tip 2: The rack under the meat and the foil-lined pan below matter more than they seem. The ribs don’t roast in their own fat but in hot air, and that’s what creates a bark on the surface instead of soft skin.
- Tip 3: If the meat still holds to the bone after 165 minutes, wrap it again and add 20 minutes. The condition of the meat decides, not the clock.
- Tip 4: Don’t throw away the leftover sauce. Stir it with a spoonful of drippings from the pan, bring to a boil, and serve separately – the flavor will combine with the smoke from roasting.
Scientific Background
Pork ribs contain a large amount of collagen, which converts to gelatin at temperatures between 160 and 200°F. This conversion needs time, not high heat – that’s why ribs cook at 250°F for three hours and not at 400°F for one hour. At higher temperatures, muscle fibers contract faster and squeeze out water before the collagen has time to convert. Salt in the dry rub dissolves surface proteins and, along with the spices, penetrates the surface layer of the meat. Sugars in the rub and sauce undergo caramelization at higher temperatures, which creates the color and aroma of the glaze; but above 355°F they begin to burn, which is why the sauce is applied only in the final minutes. Smoking adds surface absorption of aromatic compounds from the smoke to these processes.
Fine Dining – Professional Techniques
- Plate composition: Stack three ribs in a slight fan, spoon glaze over the top, and place a small scoop of coleslaw on the side so the meat juices don’t touch the vegetables.
- Texture contrasts: Soft meat calls for something crunchy – sautéed canned corn in butter, thin slices of fresh cucumber, or crispy bread toasted dry.
- Temperature Contrast: Serve the ribs hot and the coleslaw cold, straight from the fridge. The temperature difference on one plate highlights the smoky flavor of the meat.
- Aromatic Additions: Before serving, grate the zest of one lime over the glaze and add a few leaves of cilantro or parsley. The tart, fresh note lightens the sweet sauce.
Sensory Radar
- Appearance: Dark mahogany glossy glaze, pink meat peeking between the ribs, and bones partially exposed.
- Aroma: Smoke, sweet paprika, and caramelized sugar; when the foil is opened, a strong aroma of rendered pork fat emerges.
- Flavor: Sweet and smoky sauce in the first wave, then cumin and chili, finishing with the meaty flavor of pork and a mild vinegar tang.
- Texture: Sticky and glossy surface, tender meat beneath that pulls away from the bone with a fork and shreds in the mouth.
Pairings
- Beer: A pale lager with higher bitterness or an American pale ale. The bitterness cuts through the sweet glaze. Apple cider is another option—its acidity pairs well with smoke and pork.
- Wine: Dry rosé or a younger red with lower tannins, such as Zinfandel or Garnacha. Tannic and oaky reds overpower the delicate smoky flavor.
- Non-Alcoholic: Apple cider, iced tea with lemon, or homemade lime and mint lemonade. The acidity and chill balance the sweetness of the sauce.
Variations
- Smoker Variation: Smoke the ribs at 225–250°F for 3 to 5 hours over indirect heat, adding wood once every hour. The surface gets a more pronounced smoke layer, and time extends based on outdoor temperature and wind.
- Slow Cooker Variation: Place the ribs in a slow cooker on low and cook for 6 to 8 hours. This yields softer meat without bark, so transfer to a baking sheet, brush with sauce, and finish for 12 minutes at 400°F.
- Apple Cider Variation: During phase 4, baste the ribs every hour with apple cider or hard cider. The meat gets fruity sweetness and the surface stays moister.
- Coffee Rub Variation: Add ground coffee to the dry rub for darker color and deeper flavor. The coffee won’t taste bitter if used at a ratio of one teaspoon per kilogram of meat.
Allergens and Dietary Information
Contains: celery (ketchup, Worcestershire sauce); sulfites (ketchup, apple cider vinegar); fish (Worcestershire sauce); mustard (Dijon mustard) • Gluten: Worcestershire sauce and some ketchups contain barley malt, so choose products labeled gluten-free • Not suitable for: individuals with allergies to mustard, celery, fish, and soy; for gluten intolerance, check the ingredients of ketchup and Worcestershire sauce.
Suitable for
Weekend cooking, gatherings with friends, grilling season, summer celebrations, watching sports. The food is eaten with hands, so it suits informal occasions. Not suitable for a quick weeknight dinner or for those limiting salt intake.
Substitution Catalog
- Pork Ribs: baby back ribs instead of spareribs—leaner, need 20 minutes less cooking and more basting. Or beef short ribs, which extend cooking time to 4 to 5 hours.
- Apple Cider Vinegar: wine vinegar or rice vinegar. The flavor will be sharper and less fruity, but the ratio stays the same.
- Worcestershire Sauce: soy sauce with a tablespoon of vinegar and a pinch of anchovy paste or fish sauce. Saltiness is higher, so reduce salt in the rub by one-third.
- Dijon Mustard: whole-grain mustard without sugar or spicy brown mustard, which is hotter; use half the amount.
- Honey: maple syrup or molasses. Molasses gives a darker color and less sweetness.
- Smoked Paprika: sweet paprika with a few drops of liquid smoke. Keep liquid smoke to just a few drops, or it will overpower the dish.
- Ketchup: tomato puree with a tablespoon of vinegar and a tablespoon of sugar. The sauce will be thinner, so simmer it five minutes longer.
FAQ
What is the difference between baby back and spareribs?
Baby back ribs are smaller, leaner, and have a thinner meat layer—they cook faster, usually in 2.5 to 3 hours. Spareribs are flatter, fattier, and have more connective tissue, so they need 3 to 4 hours and stay juicier. Both are prepared the same way; only the cooking time differs.
Why remove the membrane?
The membrane is a tough layer that prevents seasoning from penetrating the meat and shrinks during cooking, causing the ribs to curl on the bone. Once removed, the rub reaches the meat directly and the ribs cook evenly. If the membrane sticks, use a knife to help, but do not cut into the meat.
Can I make the recipe without a smoker?
Yes, the entire recipe is written for the oven. A foil-lined baking sheet with a wire rack on top is all you need. Smoked paprika in the rub and Worcestershire sauce add a smoky undertone. The difference from a smoker is the intensity of the smoke layer, not the tenderness of the meat.
How do I know the ribs are done?
The meat will start pulling back from the bone, exposing a bare white area on the bone, and the bone will twist with slight resistance. If the meat falls apart on its own and drops off the bone, it’s overcooked and dry.
Why is the barbecue sauce applied only at the end?
The sauce contains sugar and honey, which burn and turn bitter at temperatures above 350°F. During a long cook, it would blacken before the meat is done. In the last 20 minutes at 400°F, the sugar has just enough time to caramelize and form a glossy glaze.
Do I need to marinate the ribs before cooking?
No. A dry rub needs at least an hour, ideally overnight. A marinade would only penetrate a few millimeters into the meat, and the wet surface would prevent bark formation. The salt in the rub does more for flavor than a liquid marinade.
What can I use instead of liquid smoke?
Smoked paprika, which the recipe already uses, and a tablespoon of drippings from smoked bacon added to the sauce. Liquid smoke can be found at stores that sell grilling supplies. If you use it, stick to a few drops, otherwise it will overpower the paprika and cumin.
Can I make the ribs a day ahead?
Yes. Cook them through phases 1 to 5, let cool, wrap, and refrigerate. The next day, reheat covered at 275°F for about 25 minutes, then brush with sauce and finish for 10 minutes at 400°F. This way the glaze goes on already-cooked meat.
WAGUU Petr advises: Cooking for 6 or more people?
6–8 people: Cook two racks side by side on one large baking sheet, but rotate them after 60 minutes so they cook evenly – the top rack cooks faster than the bottom. Plan on 2.5 to 3 ribs per person. 10+ people: Cook the ribs in two batches and keep the first batch covered in a 200°F oven. Make a double batch of sauce and glaze just before serving, otherwise it will harden on the surface.
Sides and serving
Storage and reheating
Refrigerator: 4 days • Freezer: 3 months • Reheating: In the oven covered with foil at 275°F for about 20 minutes; in the microwave briefly, but the meat will soften and the bark will lose its shine. Reheat the sauce separately so the meat doesn’t dry out in the oven. After thawing, fat may separate on the surface – stir the juices back in during gentle reheating.
Author: WAGUU Petr & Team • Published: 6 Oct 2026 • Updated: 9 Oct 2026
More recipes from the article
Guide: 12 most famous American dishes: traditional recipes from American cuisine
Pulled Pork – slow-roasted or smoked pork shredded into strands and served with barbecue sauce
Mac and Cheese – pasta with a rich cheese sauce, often Cheddar, baked until golden
Gumbo – thick Louisiana stew-like dish with meat or seafood, vegetables, and a heavily seasoned base
More recipes you might like
Why WAGUU?
Recipes on WAGUU are checked for accuracy of ingredients, methods, and nutritional values.
Photo gallery from the process
Photos from the community: Cook, take a photo, and share your result.
You can upload photos in the comments below or send them by email.
Did you film a video of making our recipe? Paste the link to YouTube, YouTube Shorts, TikTok, Instagram Reels, Facebook Reels, Pinterest, Vimeo, or X (Twitter) in a comment – we’ll be happy to publish it and help get you and your content noticed.
Most common mistakes
- Unremoved membrane – the membrane keeps seasoning out of the meat and shrinks during cooking, so the ribs curl on the bone and become tough. Remove it with a thin knife and a paper towel before applying the rub.
- Sauce applied at the start – the sugar and honey in the sauce will blacken and turn bitter during a long cook. Cook dry first and apply sauce only in the last 20 minutes at 400°F.
- High heat instead of time – at 400°F the meat contracts and squeezes out water before the collagen turns into gelatin. Keep it at 250°F for 3 to 4 hours; the meat’s condition decides, not the clock.
- Meat put in the oven straight from the fridge – cold ribs cook unevenly and take longer to heat through. Let them sit on the counter for 20 minutes and preheat the oven at least 20 minutes ahead.