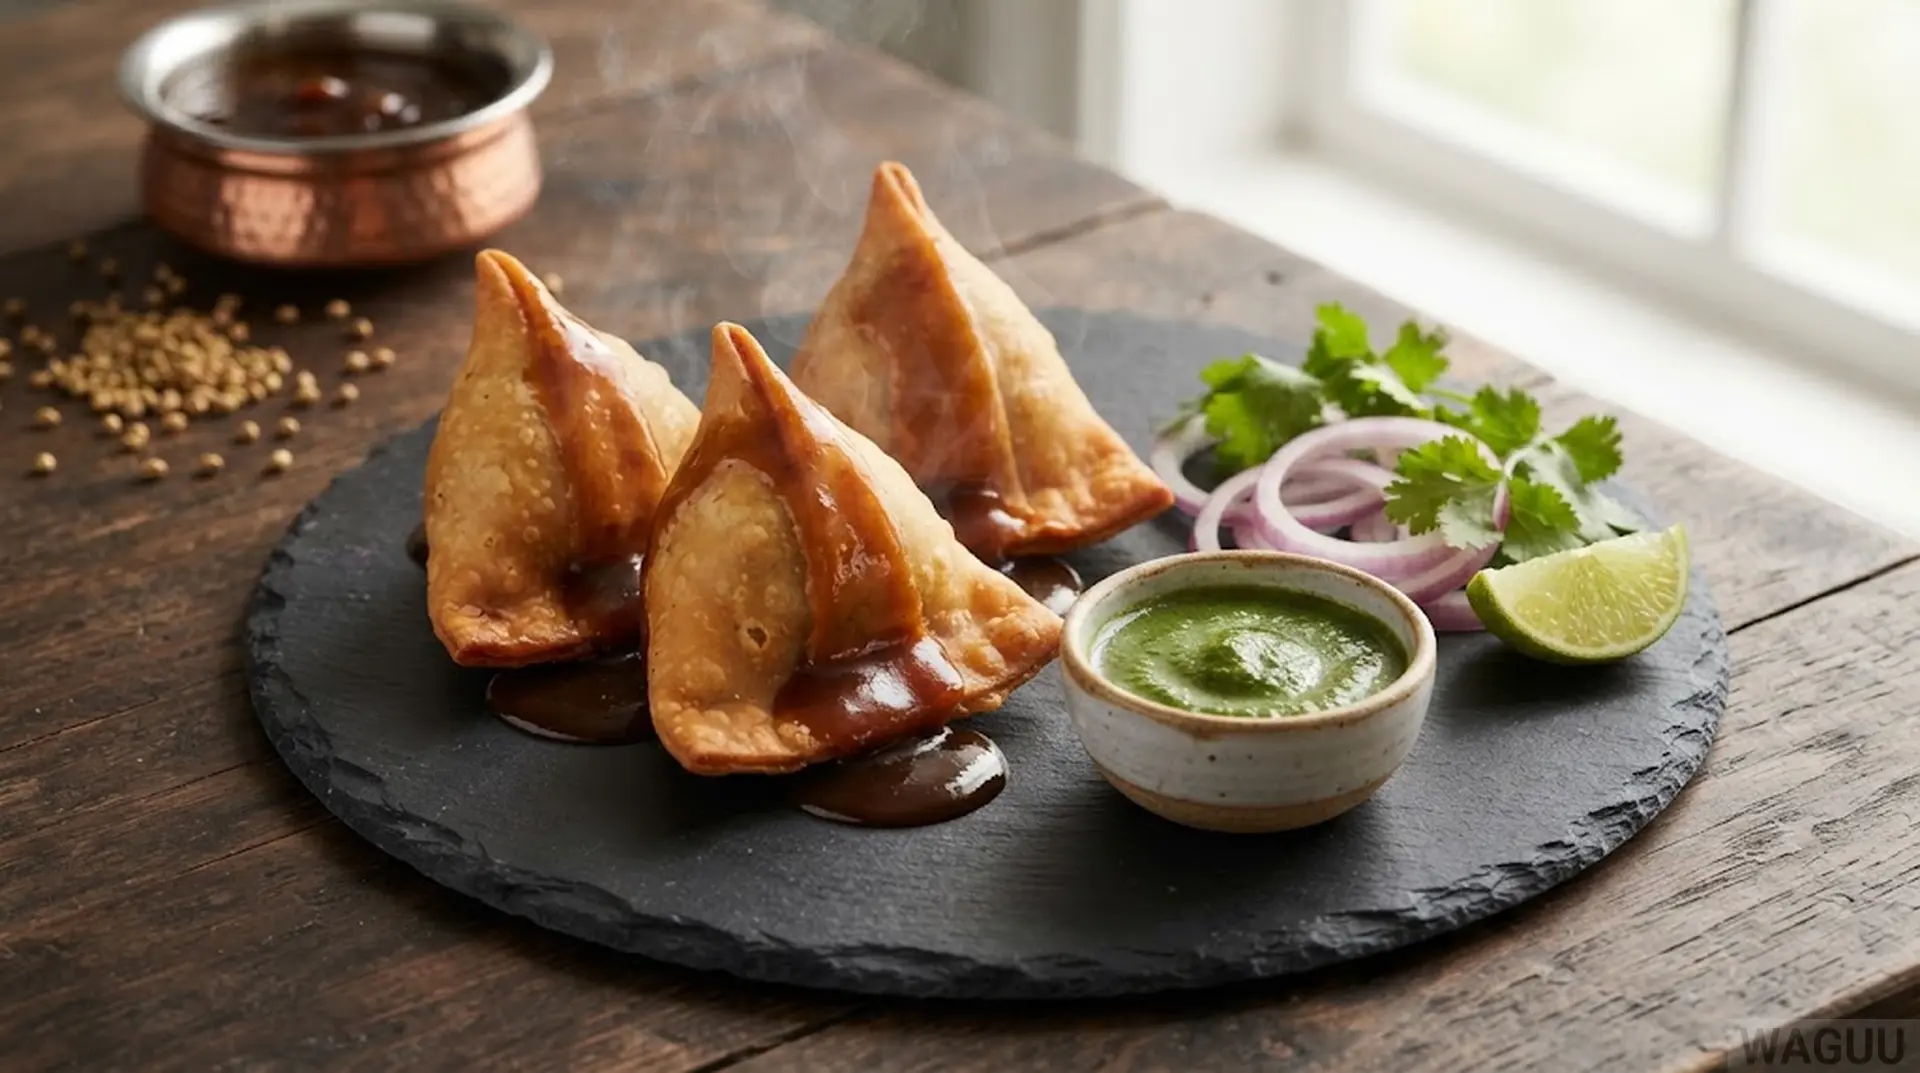
Summary: A stiff dough made from flour and ghee is rolled into thin sheets, which are folded into cones and filled with spiced potatoes and peas. The parcels are fried in oil at the right temperature until golden brown. Total time 90 minutes, makes 6 servings.
Did you make this recipe? Share your result with the community.
Category: Appetizers · Indian Cuisine
Success rate: not rated yet % of users mastered the recipe
Quick overview
- Dish: Samosa – fried triangular parcels filled with potatoes, peas, and spices
- Category: appetizers, indian-cuisine
- Cuisine: Indian
- Main ingredient: Potatoes, 1.5 lb (boiled in skin) (quality specification)
- Guide: 12 most famous Indian dishes: traditional recipes from Indian cuisine
- Total time: 90 minutes (40 min prep + 50 min cooking)
- Difficulty: Advanced
- Servings: 6 (Serving weight: 11.3 oz)
- Key technique: Shaping triangular parcels from stiff dough and frying in oil
- Preparation types: Frying, oven baking
- Dietary info & allergens: gluten (all-purpose flour); milk (ghee)
- Suitable for: Family dinner, dinner with friends, festive multi-course table, and meal prep for several days ahead.
- Nutritional values (per 1 serving): 737, Protein: 12.1 g, Fat: 42.4 g, Carbohydrates: 76.8 g
- Storage: 3 days in the fridge, 1 month in the freezer
- Pairing: Indian light lager, dry Riesling, masala chai
- In short: A stiff dough made from flour and ghee is rolled into thin sheets, which are folded into cones and filled with spiced potatoes and peas. Total time 90 minutes, 6 servings.
WAGUU says: “”Samosa fries in oil that works quietly. Not in oil that shouts.””
Key facts
| Prep time: | 40 |
| Cook time: | 50 |
| Temperature: | Frying 320–340 °F, oven baking 400 °F, dough 68–72 °F |
| Number of servings: | 6 |
At a glance
Samosa has three conditions: the dough must be stiff so it doesn’t tear, the filling must be cooled so it doesn’t steam the dough, and the oil must be at the right temperature so the parcel cooks through inside. Oil temperature is decisive – oil that’s too hot burns the surface and leaves the dough raw. Anyone frying in overheated oil gets a dark shell with pale dough inside.
Ingredients
Base servings: 6 servings • Serving weight: 11.3 oz
| Ingredient | Amount | Quality |
|---|---|---|
| all-purpose flour | 14 oz | wheat, for stiff dough |
| ghee | 2.0 oz | clarified butter, for the dough |
| potatoes | 25 oz | starchy, boiled in skin |
| frozen peas | 7.0 oz | fine, thawed |
| onion | 2 pcs | medium, finely chopped |
| ginger | 0.7 oz | fresh, finely grated |
| green chili | 2 pcs | fresh, seeded |
| ground cumin | 2 tsp | whole, for toasting |
| ground coriander | 2 tsp | ground, toasted |
| garam masala | 2 tsp | freshly ground blend |
| turmeric | 1 tsp | ground |
| red chili flakes | 1 tsp | coarse flakes |
| vegetable oil | 6.8 fl oz | for frying, withstands 355 °F (only part ends up in the food) |
| salt | 1 tsp | fine, for dough and filling |
| fresh cilantro | 0.9 oz | fresh, for the filling |
| lime | 1 pcs | juicy, for juice in the filling |
Why you’ll love this recipe
- Crispy without grease: The right oil temperature creates a dry layer on the surface that doesn’t let fat inside. The parcel is crispy, not greasy.
- Filling from what’s at home: Potatoes, peas, and spices. The dish is inexpensive and the filling can be prepared a day ahead.
- Baked or fried: The same parcels can be baked in the oven if you don’t want to fry. They’re lighter and go well with tea.
Success guaranteed: Dough made from flour and ghee is kneaded only until it holds together. The fat coats the flour particles and prevents gluten formation, so the dough doesn’t tear when rolled. Frying happens at a lower temperature than usual: the surface cooks through at the same time as the inside, and bubbles on the dough show that water is leaving properly. The filling must be cold, otherwise steam will tear the dough.
Recipe overview
Prep: 40 min min | Cooking: 50 min min | Difficulty: Advanced | Servings: 6 | Type: Appetizer | Origin: Indian
Detailed instructions
Total progress: 0 % done
Phase 1: Stiff dough – 20 min
Equipment: bowl, rolling pin, kitchen towel
1. Mix the flour with salt and ghee and knead with your hands until the mixture starts to hold together like wet sand. The fat must be worked into the flour, not just on the surface.
2. Pour in water by tablespoons and knead only as long as the dough holds. Then cover it with a towel and let it rest so the gluten relaxes.
QC: The dough is stiff, smooth, and doesn’t stick to your hands. When pressed, it holds its shape, and when stretched, it doesn’t tear.
Before you move to the next step:
Kneading too long develops gluten, and the dough springs back when you roll it. Knead briefly and let it rest.
Phase 2: Potato Filling – 20 min
Equipment: pot, skillet, wooden spoon
1. Boil the potatoes in their skins until tender, peel, and mash. Let them cool so the filling doesn’t steam the dough.
2. Heat a little oil in a skillet, add cumin and let it sizzle. Add onion, ginger, and chile, then ground coriander, turmeric, and garam masala.
3. Stir in the peas and warm through. Add the mashed potatoes, salt, lime juice, and cilantro. Let the filling cool completely.
VKB: The filling is crumbly and holds its shape when squeezed, not pasty. The flavor is spiced, slightly tangy, and hot.
Before you move to the next step:
A wet filling will soak the dough and the pockets will burst during frying. Boil the potatoes in their skins and mash them without milk or butter.
Phase 3: Rolling the Wrappers – 15 min
Equipment: rolling pin, cutting board, knife
1. Divide the dough into equal pieces and roll each into a thin oval. The wrapper should be paper-thin but not tear.
2. Cut each oval in half. Cover the wrappers with a damp towel so they don’t dry out and crack.
VKB: The wrappers are evenly thin, dry to the touch, and translucent. They hold their shape when folded and don’t crack.
Before you move to the next step:
A thick wrapper won’t cook through and the pocket will be raw inside. If the dough sticks, dust it with only a little flour—too much flour dries out the wrapper.
Phase 4: Shaping the Pockets – 20 min
Equipment: bowl of water, fingers, tray
1. Roll half of the oval into a cone: fold the edges over each other and brush with water so they stick. You’ll have a cone with an open top edge.
2. Fill the cone with a spoonful of cooled filling, don’t overfill. Brush the top edge with water, fold it over, and press to make a tight seal.
VKB: The pocket is triangular, the edges are sealed tight, and no filling shows through. It holds its shape when stood on the tray.
Before you move to the next step:
Too little water on the edge means the pocket will open during frying. Too much water makes the dough soggy. Brush on just a thin layer.
Phase 5: Frying – 15 min
Equipment: deep pot or deep fryer, thermometer, slotted spoon
1. Heat the oil to the right temperature. Test with a piece of dough: it should rise slowly and bubble, not brown immediately.
2. Fry the pockets four at a time so the oil doesn’t cool down. Turn when one side is golden and fry to an even golden brown.
3. Remove the finished pockets with a slotted spoon and drain on a rack, not on paper towels—paper towels steam them.
VKB: The surface is evenly golden brown, with fine bubbles and no large blisters. The pocket is dry to the touch and not greasy.
Before you move to the next step:
Overheated oil burns the surface and leaves the dough raw inside. Keep the temperature below 350°F and fry in small batches.
Phase 6: Serving – 5 min
Equipment: rack, serving plate, small bowls
1. Let the pockets drain on a rack and while still warm, transfer them to a plate lined with paper towels.
2. Make tamarind chutney with tamarind paste, sugar, and a pinch of chile, and mint chutney with mint, cilantro, and yogurt. Serve them in small bowls.
VKB: The pockets are dry and crisp even after ten minutes. The chutney holds on a spoon and doesn’t run.
Required Equipment
| Tool | Ideal Size | Alternative | Risk |
|---|---|---|---|
| deep pot or deep fryer | 4 qt capacity | wok or deep skillet | shallow oil cools sharply when pockets are added and the dough absorbs fat |
| kitchen oil thermometer | up to 390°F | test with a piece of dough | without measuring, oil easily overheats and the surface burns before the inside cooks |
| rolling pin | 16 in long | glass with a flat bottom | a dull rolling pin just presses the wrapper and the dough tears when folding |
| draining rack | 12 by 16 in | baking sheet with a wire rack | paper towels under the pockets steam them and the crispness is lost |
Shopping List
Nutrition Profile
Values per 1 serving (without sides). Calculated from average nutritional values of ingredients.
| Nutrient | Per 100 g | Per 1 serving | Per 6 servings |
|---|---|---|---|
| Energy | 962 kJ / 230 kcal | 3084 kJ / 737 kcal | 18502 kJ / 4422 kcal |
| Fat | 13.2 g | 42.4 g | 254.4 g |
| of which saturated | 3.3 g | 10.6 g | 63.6 g |
| Carbohydrates | 23.9 g | 76.8 g | 460.8 g |
| of which sugars | 1.9 g | 6.0 g | 36.0 g |
| Protein | 3.8 g | 12.1 g | 72.6 g |
| Salt | 0.3 g | 0.8 g | 5.0 g |
Reference intake of an average adult (8400 kJ / 2000 kcal).
WAGUU Pro Level
- Pro standard: Verified recipe with precise ratios and visual checkpoints.
- Tip 1: Verified recipe with precise ratios and visual checkpoints.
- Tip 2: The dough is stiff, smooth, and doesn’t stick to your hands. It holds its shape when pressed and doesn’t tear when stretched. Kneading too long develops gluten, and the dough springs back when you roll it. Knead briefly and let it rest.
- Tip 3: The filling is crumbly and holds its shape when squeezed, not pasty. The flavor is spiced, slightly tangy, and hot. A wet filling will soak the dough and the pockets will burst during frying. Boil the potatoes in their skins and mash them without milk or butter.
- Tip 4: Set out the ingredients in small bowls before you start. Indian cooking relies on spices added in a precise order, and there’s no time to measure while cooking.
The Science Behind It
At around 325°F, water from the surface of the dough starts to escape as bubbles, forming a thin dry layer. This keeps oil out of the dough, so the samosa isn’t greasy when fried properly. If the oil were hotter, the layer would form sooner and the inside would stay raw. Salt seasons both dough and filling, so you don’t salt the finished pastry.
Fine Dining – Professional Techniques
- Plate Composition: Stand the samosa on one side of the plate so the triangle stands upright. Place two chutneys in small bowls alongside.
- Texture Contrasts: Add contrast – thin slices of pickled onion and a cilantro leaf. Crispy dough needs a moist and acidic counterpart.
- Temperature Contrast: Put a drop of mint chutney on the tip of the pastry. The white and green colors highlight the golden-brown shell.
- Aromatic Additions: Serve on a warmed stoneware plate. Fried dough cools quickly, and crispness goes with it.
Sensory Radar
- Appearance: The pastries are triangular, evenly golden-brown, with fine bubbles on the surface.
- Aroma: Fried dough, then toasted cumin, and finally fresh cilantro and lime.
- Taste: Crispy dough, sweet potato with peas, and a finish of warm spices and lime acidity.
- Texture: The shell is dry and crisp, the filling soft and crumbly. The pastry breaks, not bends.
Pairings
- Indian light lager: A lager with higher carbonation cuts through the fat from the fried dough. Serve at 41–45°F.
- Dry Riesling: A Riesling with acidity keeps up with the spiced filling and doesn’t succumb to the fried flavor.
- Masala chai: Masala chai with milk, ginger, and cardamom. It suits an appetizer better than sweet soda.
Variations
- Baked Samosa: Brush the pastries with oil and bake at 400°F until golden brown. The dish is lighter and made without frying, but the dough is crisper.
- Meat-Filled Samosa: Replace potatoes with ground lamb, peas, and spices. A heartier version served as a main dish with chutney.
Allergens and Dietary Information
Contains: gluten (all-purpose flour); milk (ghee) • Gluten: no, the recipe contains gluten (wheat flour in the dough) • Not suitable for: individuals with celiac disease and gluten allergy
Suitable for
Family dinner, dinner with friends, a festive multi-course table, and meal prep for several days ahead.
Substitution Catalog
- all-purpose flour: whole wheat flour (dough will be denser)
FAQ
Why does my samosa burst during frying?
The filling was warm or wet, or the edges weren’t sealed well. Let the filling cool completely and brush the edges with water and press firmly.
What should the oil temperature be?
Between 325 and 340°F. A piece of dough should slowly rise and become covered with bubbles. If it browns immediately, the oil is too hot.
Can I bake samosa instead of frying?
Yes, at 400°F for about twenty minutes. Brush the pastries with oil and turn them halfway through baking. The dough will be crisper but drier.
Can the filling be made ahead?
Yes, it keeps for two days in the refrigerator. Before filling, let it come to room temperature and check that it isn’t wet.
Can I freeze samosa?
Yes, but only unfried. Arrange the pastries on a baking sheet, freeze them, then store in a bag. Fry them frozen at a lower temperature.
What to serve with samosa?
Tamarind chutney and mint chutney, along with pickled onion and yogurt. The acidity and coolness balance the fried dough.
WAGUU Petr advises: Cooking for 6 or more?
6–8 people: Make the masala (fried spice base) in double batch and refrigerate half. When cooking for more people, use two pots, not one large one – spices don’t toast evenly in too thick a layer. • 10+ people: A grill or a cast-iron pan heated in the oven to maximum can replace a tandoor. Prepare the naan dough and chicken marinade the day before and keep them in the refrigerator – both flavor and texture will be better.
Sides and Serving
Serving: Samosa is served warm, with tamarind chutney and mint chutney. Pickled onion and yogurt are part of the meal. Serve it on a paper towel to keep it dry.
Storage and Reheating
Refrigerator: 3 days • Freezer: 1 month • Reheating: Refrigerator: 3 days • Freezer: 1 month • Reheating: in the oven at 350°F for eight minutes; in the microwave the dough will soften
Author: WAGUU Petr & Team • Published: 9 Oct 2026 • Updated: 10 Oct 2026
More recipes from the article
Guide: 12 most famous Indian dishes: traditional recipes from Indian cuisine
Butter Chicken – chicken in a mild creamy tomato sauce with butter and aromatic spices
Chicken Tikka Masala – pieces of marinated chicken in a spiced tomato-cream sauce
Tandoori Chicken – chicken marinated in yogurt and spices and cooked at high heat
Biryani – aromatic layered rice with meat, saffron, and a blend of spices
Palak Paneer – Indian paneer cheese in a mildly spiced spinach base
Palak Paneer – Indian paneer cheese in a mildly spiced spinach base
Chana Masala – chickpeas simmered in a spicy sauce of tomatoes, onions, and aromatic spices
Dal Tadka – lentils flavored with fried spices, garlic, onion, and chili
Masala Dosa – thin crispy fermented rice and lentil crepe with spiced potatoes
Chole Bhature – spiced chickpeas with large fried leavened bhature breads
Naan – traditional Indian flatbread baked at high heat in a tandoor
More recipes you might like
Why WAGUU?
Recipes on WAGUU are checked for accuracy of ingredients, procedures, and nutritional values.
Photo Gallery from the Process
Community photos: Cook, take a photo, and share your result.
You can upload photos in the comments below or send them by email.
Did you film a video of our recipe? Paste the link to YouTube, YouTube Shorts, TikTok, Instagram Reels, Facebook Reels, Pinterest, Vimeo, or X (Twitter) in the comments – we’ll be happy to publish it and help you and your content get noticed.
Most Common Mistakes
- Tough Dough – Long kneading develops gluten and the dough shrinks back when rolled. Knead briefly and let it rest.
- Potato Filling – Wet filling soaks the dough and the pastries burst during frying. Boil potatoes in their skins and mash them without milk and butter.
- Rolling the Sheets – A thick sheet won’t cook through and the pastry will be raw inside. If the dough sticks, dust with just a little flour – too much flour dries out the sheet.
- Shaping the Pastries – Too little water on the edge means the pastry opens during frying. Too much water soaks the dough. Brush only a thin layer.