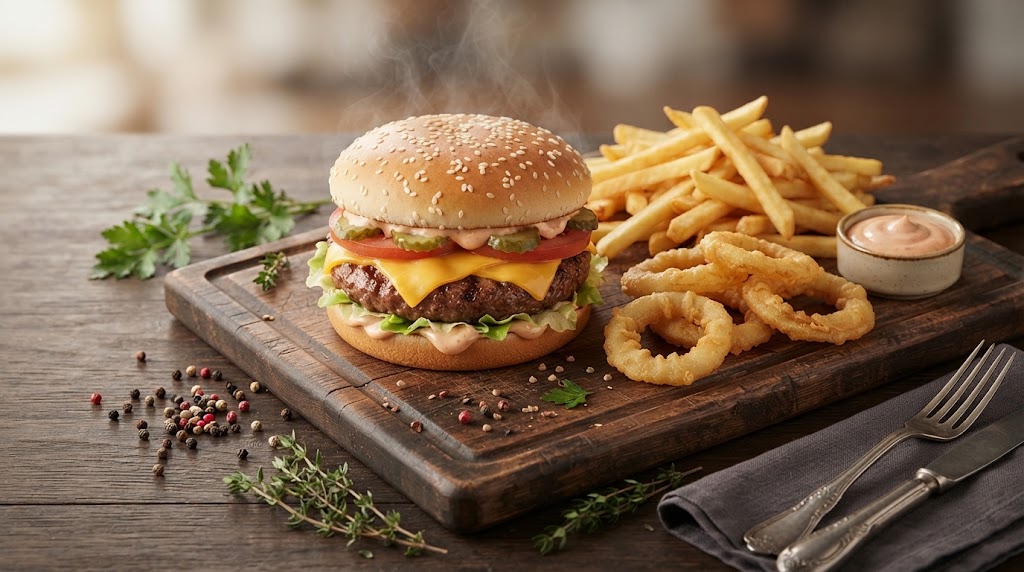
Summary: A proper American take on the classic cheeseburger. Coarse-ground 80/20 beef chuck, seasoned simply with salt and pepper, smashed in a screaming hot cast iron skillet, and topped with American cheese that melts into every crevice. Served in a toasted sesame seed bun with crisp lettuce, ripe tomato, red onion, and pickles. Ready in 25 minutes. Serves 6.
Made this recipe? Share your result with the community.
Category: American Beef, American US Cuisine
Success rate: not rated yet % of users mastered this recipe
Quick overview
- Dish: Classic Cheeseburger with Ground Beef and American Cheese
- Category: American Beef, American US Cuisine
- Cuisine: American
- Main ingredient: 80/20 ground beef chuck, 1.2 kg (2.6 lbs)
- Guide: The Ultimate Cheeseburger Guide (American Edition)
- Total time: 25 minutes (15 min prep + 10 min cooking)
- Difficulty: Easy
- Servings: 6 (Portion weight: 280 g / 10 oz)
- Key technique: Smash burger technique, pan-searing
- Preparation types: Pan-frying, grilling
- Dietary info & allergens: Contains gluten, milk, egg. May contain mustard.
- Suitable for: Quick weeknight dinner, weekend treat, family meal
- Nutritional values (per serving): 620 kcal, Protein: 38 g, Fat: 38 g, Carbohydrates: 32 g
- Storage: 2 days in fridge, 2 months in freezer
- Pairing: Lager, Zinfandel, root beer
- In short: A proper American cheeseburger with ground beef and American cheese – simple, honest, and deeply satisfying.
- Last updated: 13 September 2026
WAGUU says: “The best cheeseburger is the one you make yourself, with beef you trust and cheese that actually melts.”
Key facts
| Prep time: | 15 minutes |
| Cook time: | 10 minutes |
| Temperature: | Cast iron skillet on high heat |
| Servings: | 6 |
In a nutshell
A proper American cheeseburger – coarse-ground beef, American cheese, and a toasted sesame bun. Nothing fancy, just honest food done right.
Ingredients
Base servings: 6 servings • Portion weight: 280 g / 10 oz
| Ingredient | Amount | Quality |
|---|---|---|
| 80/20 ground beef chuck | 1200 g | Coarse ground, fresh |
| American cheese slices | 6 slices | Room temperature |
| Sesame seed buns | 6 pieces | Fresh, split |
| Unsalted butter | 30 g | For toasting buns |
| Kosher salt | 12 g | For seasoning |
| Black peppercorns, freshly ground | 6 g | Coarse grind |
| Iceberg lettuce | 12 leaves | Crisp, washed, dried |
| Beefsteak tomatoes | 2 pieces | Ripe, sliced 1 cm thick |
| Red onion | 1 piece | Thinly sliced |
| Dill pickles | 12 pieces | Sliced lengthwise |
| Mayonnaise | 120 g | Good quality |
| Ketchup | 60 g | For burger sauce |
| Dijon mustard | 15 g | For burger sauce |
Why you’ll love this recipe
- Simple: Few ingredients, all easy to find. No fancy equipment needed.
- Fast: Ready in 25 minutes from start to finish.
- Reliable: The technique is foolproof – hot skillet, smash, one flip, melted cheese.
Success guaranteed: If you follow the steps and use the right beef, you’ll get a juicy, flavorful burger with a proper crust every time.
Recipe overview
Prep: 15 min | Cook: 10 min | Difficulty: Easy | Servings: 6 | Type: Main dish | Origin: American
Detailed method
Total progress: 0 % done
Phase 1: Preparing the burger sauce – 3 min
Equipment: Small bowl, spoon
1. In a small bowl, mix 120 g mayonnaise, 60 g ketchup, and 15 g Dijon mustard until smooth. Season with a pinch of kosher salt and a few grinds of black pepper. Taste and adjust – it should be tangy, creamy, and slightly sweet. Set aside.
VKB: The sauce is smooth, pale pink, and holds its shape on a spoon.
Before you move on:
Don’t overmix the sauce. If it’s too thick, add a teaspoon of water. If it’s too thin, add a little more mayonnaise.
Phase 2: Forming the patties – 5 min
Equipment: Baking sheet lined with parchment paper, digital scale
2. Divide the 1.2 kg ground beef into 6 equal portions (200 g / 7 oz each). Gently shape each portion into a loose ball – do not compact the meat. Place on the lined baking sheet and refrigerate while you prepare the buns. Do not form into patties yet – the smash technique works best with loose balls of beef.
VKB: Beef portions are uniform, loosely packed, and hold together but are not compressed.
Before you move on:
Never salt the meat in advance. Salt draws out moisture and makes the burger dense. Season only the surface just before cooking.
Phase 3: Toasting the buns – 2 min
Equipment: Cast iron skillet, spatula
3. Place a large cast iron skillet over medium heat. Add 15 g of unsalted butter. Once melted, place the split buns cut-side down in the skillet. Toast for 1–2 minutes until golden brown and slightly crisp. Remove and set aside. Repeat with the remaining butter and buns.
VKB: Buns are golden brown on the cut side, with a slight crispness. They smell nutty and buttery.
Before you move on:
Don’t walk away while toasting the buns – they can burn in seconds. Keep an eye on them and adjust the heat if needed.
Phase 4: Smashing and searing the patties – 4 min
Equipment: Cast iron skillet, sturdy metal spatula, parchment paper, kitchen paper
4. Wipe the skillet clean with kitchen paper. Place over high heat and let it get smoking hot – this takes 3–4 minutes. Place a loose ball of beef in the skillet. Immediately press down firmly with a sturdy metal spatula (use a piece of parchment paper between the spatula and the beef to prevent sticking) for 10 seconds. Repeat with the remaining beef balls – cook in batches; don’t overcrowd. Season generously with kosher salt and black pepper. Sear for 2 minutes without moving them. Flip once, season the other side, and sear for another 1–2 minutes. Do not press down after the initial smash.
VKB: Patties are thin with lacy, crispy edges. They have a deep brown crust on both sides. Internal temperature for medium-rare is 130–135°F (55–60°C).
Before you move on:
Never press down on the patties after the initial smash. Pressing squeezes out the juices and makes the burger dry. Let the crust form naturally.
Phase 5: Melting the cheese – 1 min
Equipment: Cast iron skillet, lid or metal bowl
5. In the last minute of cooking, place a slice of American cheese on top of each patty. Cover the skillet with a lid or an inverted metal bowl to trap the steam. The cheese will melt and drape over the patty. Remove the patties from the skillet and rest on a warm plate for 2 minutes.
VKB: Cheese is fully melted, glossy, and covers the top of the patty. It drapes slightly over the edges.
Before you move on:
Don’t leave the cheese on for too long – it can split and become greasy. One minute with the lid on is usually enough.
Phase 6: Assembling the burger – 3 min
Equipment: None
6. Spread a generous tablespoon of burger sauce on the bottom half of each toasted bun. Add a few lettuce leaves, then a slice of tomato, and a few slices of red onion. Place the rested patty with melted cheese on top. Add 2 pickle slices per burger. Spread a little more sauce on the top bun and place it on top. Press gently to compress. Serve immediately.
VKB: The burger holds together when pressed. The cheese is visible and melted. The bun is soft but sturdy.
Equipment needed
| Item | Ideal size | Alternative | Risk |
|---|---|---|---|
| Cast iron skillet | 12-inch (30 cm) | Heavy stainless steel skillet | Thin skillet won’t hold heat – poor sear |
| Sturdy metal spatula | Wide, flat blade | Burger press | Thin spatula will bend during smashing |
| Digital scale | 0.1 oz / 1 g precision | Kitchen scale | Inaccurate portions affect cooking time |
Shopping list
Nutritional profile
Values per 1 serving (without sides). Calculated from average nutritional values of ingredients.
| Nutrient | Per 100 g | Per 1 serving | Per 6 servings |
|---|---|---|---|
| Energy | 221 kcal | 620 kcal | 3720 kcal |
| Fat | 13.6 g | 38 g | 228 g |
| of which saturates | 6.1 g | 17 g | 102 g |
| Carbohydrates | 11.4 g | 32 g | 192 g |
| of which sugars | 3.2 g | 9 g | 54 g |
| Protein | 13.6 g | 38 g | 228 g |
| Salt | 0.9 g | 2.5 g | 15 g |
Reference intake of an average adult (8400 kJ / 2000 kcal).
WAGUU Pro level
- Profi standard: Verified recipe with precise ratios and visual checkpoints.
- Tip 1: Ask your butcher to grind the beef fresh on the day. The difference in texture and flavor is remarkable.
- Tip 2: Let the beef come to room temperature for 15 minutes before cooking. This ensures even cooking.
- Tip 3: Use a cast iron skillet if you have one. It retains heat better than a regular skillet and gives a deeper crust.
- Tip 4: Toast the buns in the same skillet after cooking the patties. The beef fat adds incredible flavor.
Scientific background
The Maillard reaction is a chemical reaction between amino acids and reducing sugars that gives browned food its distinctive flavor. It occurs when beef is seared at high temperatures (above 285°F / 140°C). The reaction creates hundreds of new flavor compounds, including pyrazines and furans, which contribute to the savory, roasted notes of a properly cooked burger. The smash technique increases the surface area in contact with the hot skillet, maximizing the Maillard reaction and creating a lacy, crispy crust.
Fine Dining – Professional techniques
- Plate composition: Serve the burger on a wooden board or slate tile. Place the burger slightly off-center and add a small bowl of extra sauce on the side.
- Texture contrasts: The crisp lettuce, soft bun, juicy patty, and melted cheese create a perfect balance of textures.
- Temperature contrast: Serve the burger hot with a cold side salad or pickles.
- Aromatic additions: Add a few fresh basil leaves or a drizzle of truffle oil for a gourmet touch.
Sensory radar
- Appearance: Deep brown crust on the patty, melted cheese draping over the sides, colorful toppings.
- Aroma: Savory beef, toasted sesame, melted American cheese, fresh lettuce.
- Taste: Rich, beefy, salty, with tang from the sauce and pickles.
- Texture: Crisp crust, juicy interior, soft bun, crunchy lettuce.
Pairing
- BEER: Lager or IPA – the crispness cuts through the richness of the beef and cheese.
- WINE: Zinfandel or Syrah – full-bodied reds with enough tannin to stand up to the burger.
- NON-ALCOHOLIC: Root beer or homemade lemonade – sweet and refreshing.
Different preparation variations
- Grilled: Cook on a barbecue or griddle pan for a smoky char. Preheat to high, oil the grates, and cook for 3–4 minutes per side.
- Air fryer: Cook at 400°F (200°C) for 10–12 minutes, flipping halfway. The result is less crusty but healthier.
Allergens and dietary information
Contains: Gluten, milk, egg, mustard • Gluten: Contains (from buns) • Not suitable for: Gluten-free, dairy-free, egg-free diets
Suitable for
Quick weeknight dinner, weekend treat, family meal, casual entertaining
Substitution catalogue
- Ground beef: Ground turkey or chicken (add oil to the skillet), plant-based ground beef for vegan version
- American cheese: Sharp Cheddar, Swiss, Gruyère, vegan cheese
- Sesame seed buns: Brioche buns, gluten-free buns, lettuce wraps
- Mayonnaise: Greek yogurt, vegan mayo
FAQ
Can I use a different type of cheese?
Yes. American cheese is the classic choice, but you can use sharp Cheddar, Swiss, Gruyère, or a good melting cheese like Monterey Jack.
How do I cook burgers on a barbecue?
Preheat the barbecue to high. Oil the grates. Cook the patties for 3–4 minutes per side. Don’t press down. Add cheese in the last minute and close the lid.
Can I make this recipe ahead of time?
You can form the beef balls up to 24 hours in advance and keep them in the fridge. Bring to room temperature before cooking. The sauce can also be made ahead and stored in the fridge.
What is the best way to melt the cheese?
Add the cheese slice in the last minute of cooking, then cover the skillet with a lid or an inverted metal bowl. The trapped steam melts the cheese quickly without overcooking the patty.
WAGUU Petr advises: Cooking for 6 or more?
6–8 people: Cook the patties in batches. Keep cooked patties warm in a low oven (200°F / 100°C) while you cook the rest. • 10+ people: Consider making smaller patties (150 g / 5 oz each) and serving them as sliders. You can also cook the patties on a large griddle or barbecue.
Sides and serving
- Homemade Fries – Crispy, golden, and fluffy inside (not part of the recipe)
- Onion Rings – Crispy battered onion rings (not part of the recipe)
Serving: Serve the burger immediately on a wooden board or plate. Add a side of fries or onion rings. Provide extra sauce and pickles on the side.
Storage and reheating
Fridge: 2 days • Freezer: 2 months (patties only) • Reheating: Reheat patties in a hot skillet for 1–2 minutes per side. Buns can be refreshed in a toaster or oven.
Other recipe variations
Other recipes you might like
Why WAGUU?
Recipes on WAGUU are checked for accuracy of ingredients, methods, and nutritional values.
Photo gallery
Community photos: Cook it, photograph it, and share your result.
You can upload photos in the comments below or send them by email.
Filmed a video of this recipe? Post a link to YouTube, YouTube Shorts, TikTok, Instagram Reels, Facebook Reels, Pinterest, Vimeo or X (Twitter) in the comments – we’ll feature it and help promote you and your content.
classic-cheeseburger-with-ground-beef-and-american-cheese@waguu.online
Most common mistakes
- Overworking the meat – Makes the burger dense and tough. Handle the beef gently.
- Using lean beef – 20% fat is essential for juiciness and flavor. Lean beef makes dry burgers.
- Pressing the patties after the smash – Squeezes out the juices. Only press during the initial smash.
- Not resting the patties – Rest for 2 minutes before assembling. This allows the juices to redistribute.